

Car sunroof repair for leaks, jams & electrical issues. Expert fixes for smooth operation. Schedule your repair today!
There’s nothing quite like the feeling of cruising down the road with the sunroof open, the fresh air flowing in, and the sky overhead. It’s one of life’s simple driving pleasures. But when that sunroof starts sticking, leaking, or making strange noises, it can quickly turn from a joy into a major headache. The good news? You don’t always need to panic or rush to a costly dealership. With the right guidance, a bit of patience, and some common tools, many common sunroof problems can be tackled right in your own driveway.
We’ll use simple, easy-to-understand language, just like a professional mechanic explaining it to a friend. We’ll also talk about the importance of regular sunroof maintenance and when a job might be better left to the experts—like the friendly team at Shujha Auto Garage Services.
Understanding Your Sunroof: It’s More Than Just a Window
Before you start prying things open, it’s helpful to know what you’re working with. Most modern sunroofs are complex assemblies with several key parts:
- The Glass Panel: The visible part that opens and closes.
- The Seal/Weatherstripping: The rubber gasket that runs around the glass to keep water and wind out.
- The Tracks/Channels: The guide rails on either side that the sunroof slides on.
- The Motor and Drive Mechanism: The electric motor (or manual crank) that provides power, often connected to a set of cables or gears.
- The Drain Tubes: Four small hoses (usually one in each corner) that channel water that seeps past the seal down and out of the bottom of your car.
Problems can occur with any of these components. A good sunroof diagnostic process starts with knowing which one is likely the culprit.
Common Problem #1: The Dreaded Sunroof Leak
This is the most common and urgent issue. Finding water dripping onto your head or a damp passenger floor is alarming.
Step-by-Step DIY Fix for Leaks:
- Initial Sunroof Inspection:
- Clean the Area: First, thoroughly clean the top of your car, especially around the sunroof glass and seal. Remove all leaves, pine needles, and dirt. Often, a leak is simply caused by a clog that forces water to overflow the seal.
- Inspect the Seal: Run your finger along the rubber weatherstripping. Look for any obvious cracks, tears, or sections that are flattened or deformed. If the seal is brittle or damaged, it needs replacement.
- The Drain Tube Test (The Most Likely Fix):
Clogged drain tubes cause 90% of leaks. They’re located in the sunroof’s corners, inside the channel that surrounds the glass.
- Find the Tubes: Open your sunroof. Look in the four corners of the sunroof “well” or tray. You’ll see small holes.
- The Test: Slowly pour a small cup of water into the front drain channels. Do NOT use high pressure. Watch to see if water quickly drains out underneath your car (near the front wheels for the front tubes, near the rear wheels for the back tubes). If the water pools in the tray or drains very slowly, the tube is clogged.
- The Fix: You can gently clear these tubes using a long, flexible tool. The best tool is a specialized sunroof drain brush, but a thin, soft weed trimmer line or a pipe cleaner can work. Crucially, never use compressed air, as you can blow the tubes off their connectors inside the pillar, creating a much bigger, hidden leak. Gently feed the line down the tube until you feel resistance, then carefully work it through. Flush again with water to confirm it’s clear.
- Resealing the Glass (Advanced DIY):
- If the seal and drains are fine, the leak might be between the glass panel and its frame. This requires removing the interior headliner and the glass panel itself—a more involved job.
- This involves carefully unbolting the glass, cleaning off the old adhesive/sealant, and applying a new ribbon of butyl tape or automotive-grade urethane sealant before re-installing. If you’re not comfortable with this level of disassembly, this is a key moment to call a professional.
Location: Please Visit Our Shujha Auto Garage
Common Problem #2: Sunroof Won’t Open or Close (Electrical Issues)
You press the button and hear a click or nothing at all.
Step-by-Step DIY Diagnostic & Fix:
- Basic Sunroof Diagnostic Checks:
- Listen: Press the switch. Do you hear a faint motor whirring or straining? If so, the motor has power but the mechanism might be jammed. If you hear nothing, the issue is likely electrical.
- Check the Fuse: Consult your owner’s manual to find the sunroof fuse location (usually in the dashboard or engine bay fuse box). Pull it out and inspect the tiny metal wire inside. If it’s broken, replace it with a fuse of the exact same amperage. This is the simplest and cheapest fix.
- Check the Switch: Sometimes the switch itself fails. If you have a multimeter or can temporarily swap the switch with an identical one from another part of the car (like a window switch), you can test it.
- The Manual Override:
Every electric sunroof has a manual way to close it, which is crucial if it’s stuck open and rain is coming! Often, you need to remove the switch or a small cover near the motor (usually accessed by dropping the headliner or a trim panel in the roof) to find a hex key socket. Insert the provided tool (often in your car’s toolkit) and turn it to manually crank the sunroof closed. Your owner’s manual will have specific instructions.
- Motor Replacement:
If the fuse and switch are good, the motor may have failed. Replacing it typically involves lowering the headliner, unplugging the old motor, unbolting it, and installing a new one. It’s a matter of patience and labeling connectors, but it’s very doable.
Common Problem #3: Grinding, Crunching, or Sticking Noises
This usually points to a mechanical problem in the tracks or drive mechanism.
Step-by-Step DIY Fix:
- Clean and Lubricate (Primary Maintenance):
- Clean: Open the sunroof all the way. Use a soft brush and a vacuum to remove all dirt, sand, and old grease from the guide tracks. Stiff old grease can act like glue.
- Lubricate: This is the heart of good sunroof maintenance. You must use the correct lubricant. Silicone-based spray lubricant is ideal for the rubber seals (wipe on with a cloth to keep them supple and prevent leaks). For the metal tracks and sliding parts, use a white lithium grease or a dedicated sunroof track grease. Apply sparingly—a little goes a long way. Avoid petroleum-based greases as they can damage rubber and attract more dirt.
- Cycle the Sunroof: Open and close it several times to work the new lubricant into the mechanism.
- Inspect for Physical Damage:
During your cleaning, look closely at the plastic guides or sliders on the sides of the sunroof tray. Are they cracked or broken? Look at the cables—are they frayed? A broken plastic guide is a common cause of misalignment and sticking. Replacing these parts requires significant disassembly and is a job where professional expertise can save you hours of frustration.
Common Problem #4: Sunroof is Misaligned
If the glass sits too high, too low, or doesn’t sit flush when closed, it can cause wind noise and leaks.
Step-by-Step DIY Adjustment:
- Find the Adjustment Points:
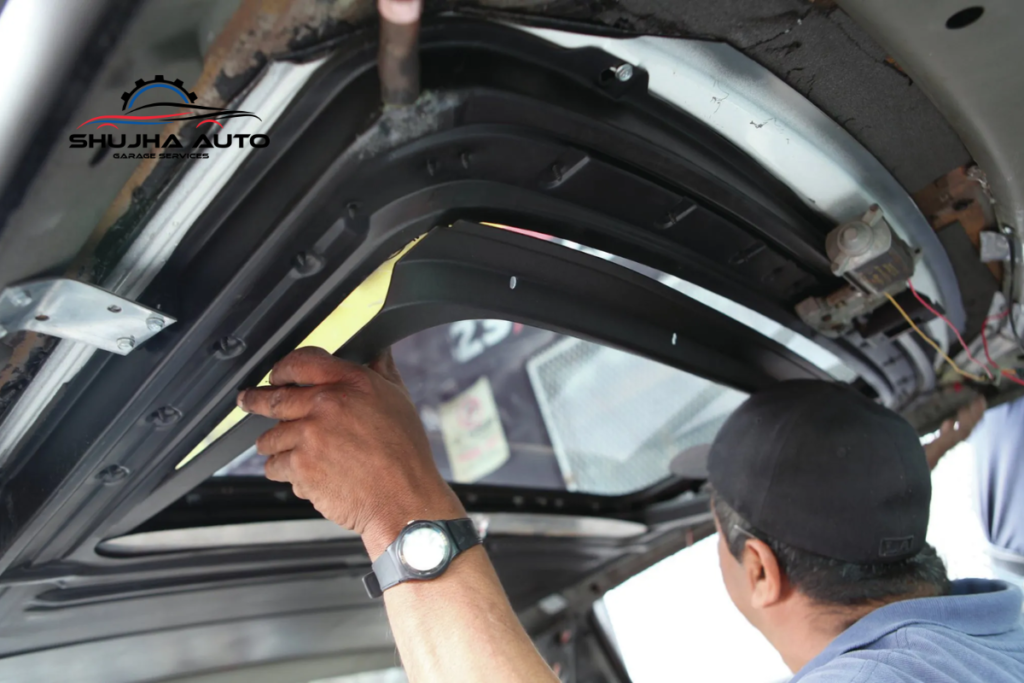
- When closed, the Sunroof glass is usually held by two or more brackets on each side, attached by bolts. These bolts sit in elongated slots, allowing for adjustment.
- You will need to drop the headliner partially to access these bolts. They are often Torx or Allen head bolts.
- The Adjustment Process:
- Mark Your Starting Point: Before turning any bolts, use a marker or painter’s tape to note the current position of the bracket. This is your safety net.
- Make Tiny Adjustments: Loosen the bolts just enough so the bracket can slide. Make adjustments of 1-2 millimeters at a time. Tighten the bolts and check the fit.
- Test: The goal is a perfectly flush, even fit all around. This process requires patience and repeated testing. If the alignment is severely off, the root cause may be a broken guide or cable, which adjustment alone won’t fix.
Knowing Your Limits: When to Call a Professional
DIY is empowering, but it’s also wise to know when a problem is beyond a safe or practical driveway fix. You should consider professional help if:
- The headliner needs to be fully removed (it’s fragile and easy to damage).
- The drain tubes are disconnected inside the car’s pillars.
- The sunroof cassette (the entire frame) is cracked or damaged.
- The drive cables are snapped or gears are stripped.
- You’ve tried the basic fixes and the problem persists.
This is where a trusted local garage becomes invaluable.
Spotlight on Professional Help: Shujha Auto Garage Services
At some point in your sunroof diagnostic journey, you might think, This is more than I signed up for. That’s perfectly okay! Complex mechanisms, hidden fasteners, and the risk of causing a larger leak or electrical issue are real concerns. This is the exact moment when the skilled technicians at Shujha Auto Garage Services are ready to help.
We understand the intricacies of sunroof systems across all major car brands. What sets us apart is our transparent and customer-focused approach.
Your Questions, Answered:
What happens if an issue is found during a diagnostic?
Our technician will walk you to your car, show you exactly what’s wrong, and explain it in plain, simple language—no confusing jargon. We’ll provide a clear, written estimate for the repair, outlining the necessary parts and labor. You will never be pressured into a repair. The choice is always yours, and we’ll give you honest advice on what’s urgent and what can wait.
Are there any hidden fees or charges?
No. At Shujha Auto Garage Services, we believe in transparency. The price quoted on your estimate is the price you pay. We will always contact you for approval before performing any work outside the original estimate. No surprises, just honest service.
What’s included in the free diagnostic check?
Our complimentary Sunroof Inspection and diagnostic is a thorough process. It includes:
- A visual inspection of the glass, seal, and tracks.
- Testing the sunroof operation through all its functions (open, close, tilt).
- Checking and clearing the four primary drain tubes (a common fix on its own!).
- A check of the related fuses and electrical connections.
- A full report on our findings and a recommendation for any needed repairs, with a clear, upfront cost.
Conclusion: Enjoy the Open Road Again
Regular sunroof maintenance—cleaning the seals, keeping drains clear, and applying the right lubricant—can prevent most of these problems. A little care goes a long way.
But when issues arise, you now have the knowledge to tackle many of them yourself. Start with the simple checks: the fuse, the drains, and a good cleaning. Remember, patience and the right tools are your best friends.
And when the job gets too big, or you simply want the peace of mind that comes with professional service, remember that Shujha Auto Garage Services is just a phone call away. We’re here to get your sunroof—and your driving enjoyment—back in perfect working order.
So, roll down those windows, open that sunroof, and get back to enjoying the drive. The sky’s the limit