


Learn from my experience! Discover the common mistakes I made while trying headlight restoration at home and how to avoid them for better results.
Many DIY fans face challenges when trying to Restore Headlights. You might think it’s simple, but it’s not. Missing key steps or using the wrong tools can lead to trouble. Clear headlights are crucial for safe driving, but DIY mistakes can happen quickly.
I’ve been there, and I’m here to share my mistakes so that you can avoid the car maintenance mistakes I made.
Fixing foggy or yellowed headlights can be challenging. Let’s examine common mistakes and how to avoid them. Then, we’ll aim for clear headlights for your car together.
Key Takeaways
- Understand the importance of clear headlights for safety.
- Avoid common errors in DIY headlight restoration by researching first.
- Recognize that mistakes in car maintenance can detract from your vehicle’s performance.
- Consider using professional kits designed for headlight restoration.
- Patience and careful planning can lead to successful restoration.
Understanding the Need for Headlight Restoration
Keeping your vehicle in top shape is key, including the need for headlight restoration. Over time, headlights can get dull and oxidized. This makes them less effective, leading to poor visibility at night or in bad weather.
Good headlight clarity is not just about seeing better. It’s also about staying safe on the road. Dull headlights can raise the risk of accidents because they don’t light up the road well. Restoring your headlights ensures you can see and be seen by others.
But there’s more to it than safety. Bright headlights make your car look better and boost its value. A car that looks good, with clear headlights, makes a great impression. So, understanding the necessity of headlight restoration helps make your drive safer and more enjoyable.
Common Signs Your Headlights Need Restoration
Knowing the signs of headlight decay is important to staying safe on the road. Headlights often show clear signs when they need fixing. Look out for these common problems to know when to restore headlights.
- Foggy or yellowed lenses are a common sight. UV rays break down the plastic, affecting visibility.
- Reduced brightness means your headlights aren’t working well. Dim lights can make driving at night dangerous.
- Scratches or chips on the surface show wear and tear. It’s crucial to fix these issues quickly.
Knowing these indicators for headlight repair helps you check your headlights and act fast. Taking care of your headlights improves your safety and extends your vehicle’s lighting life.
Tools and Supplies Required for Headlight Restoration
Starting a headlight restoration project? You’ll need the right headlight restoration tools for the best results. You’ll need different supplies to handle various levels of damage.
First, get high-quality sandpaper in different grits. Use the coarsest grit first to remove the worst damage. Then, switch to finer grits for a smooth finish—brands like 3M and Meguiar offer great options.
Polishing compounds are also key. They help make your headlights clear again after sanding. Look for products made for headlight restoration, like those from Turtle Wax or Shujha Auto Garage.
Don’t forget UV sealants to protect your headlights from future damage. These sealants create a barrier against harsh weather. Choose ones that are safe for car surfaces.
Lastly, gather all the tools you’ll need, like microfiber cloths, water spray bottles, and masking tape. This will make the process easier and help you get your headlights looking new again. With these tools and supplies, you’re ready to get professional-quality results.
Location: Please Visit Our Shujha Auto Garage
Choosing the Right Headlight Restoration Method
Choosing the proper headlight restoration method is key to getting the best results. You can choose from DIY solutions, professional kits, or something in between. Knowing the pros and cons of each can help you decide based on your needs and budget.
DIY methods use items like baking soda or vinegar. They’re cheap and can fix minor problems quickly. But they might not last long. For serious cloudiness or oxidation, you might need a different cleaning method.
Professional kits, like those from 3M and Meguiar’s, offer more thorough solutions. They come with clear instructions to help you do it right. Before choosing, consider your headlights’ condition and how much time you want to spend.
Choosing the right method can really improve your car’s look and safety. Weighing the pros and cons will help you choose the best option.
Mistakes in the Headlight Restoration Process
Restoring your headlights can make your car look better and improve visibility. However, many people make mistakes that can ruin the results. Knowing these errors can help you do a great job.
One big mistake is using the wrong materials. Using something not made for headlight restoration can cause problems. Always choose high-quality kits from trusted brands.
Another big mistake is not preparing the surface correctly. If you don’t clean your headlights well, it can mess up the restoration. Make sure to wash your headlights before starting to avoid problems.
Many people also don’t follow instructions well, which can lead to using products incorrectly or using the wrong technique. Always take your time to read and understand the directions. By knowing these common mistakes, you can do a better job and be happy with the results.
Headlight Restoration: Techniques and Tips
Restoring your vehicle’s headlights makes nighttime driving safer. It’s key to know how to do it right. Start by cleaning with soap and water to remove dirt and grime. This prepares the surface for the next steps.
For sanding, use wet/dry sandpaper. Start with coarse grit and move to finer ones. This smooths the plastic and removes oxidation. Keep the surface wet to avoid scratches and get a smooth finish.
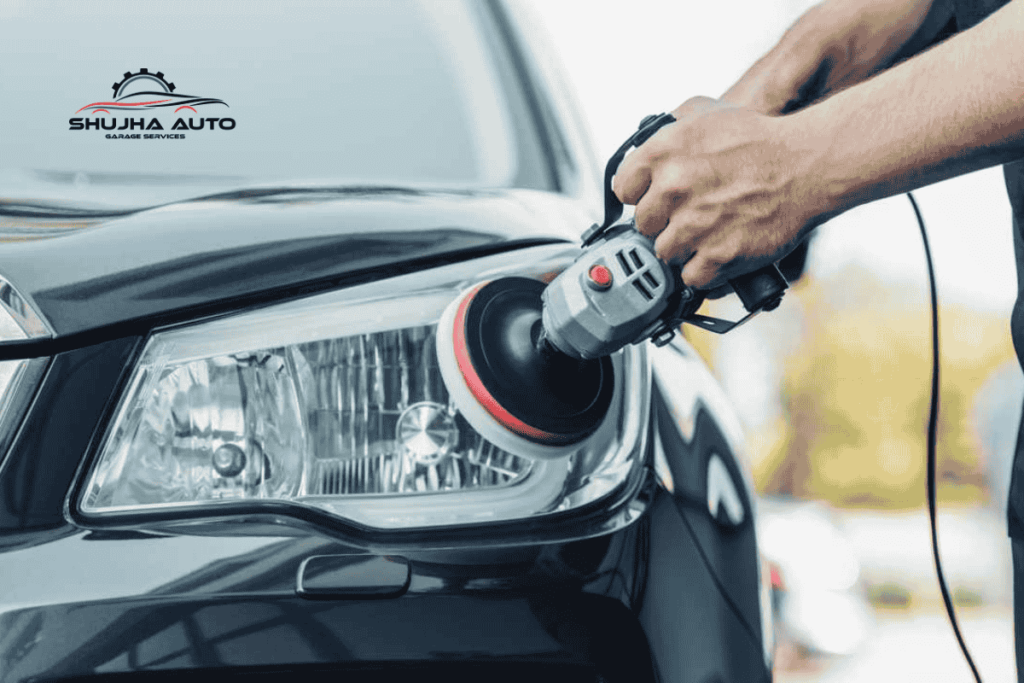
Polishing is vital for clear headlights. Choose a good plastic polish or a headlight restoration kit. Use a microfiber cloth in circles to remove the haze and return the shine.
- Tips for effective restoration:
- Work in a shaded area to prevent the product from drying too quickly.
- Consider applying a UV sealant post-restoration to protect against further yellowing.
- Test the clarity during the restoration process by periodically wiping the haze away.
Following these steps will provide immediate and long-term benefits. Enhancing headlight clarity is a big step towards making your vehicle safer.

Fixing Yellowed Headlights: A Step-by-Step Guide
You need a clear plan to fix yellowed headlights. This guide will help you restore your headlights to their original state. It’s a step-by-step process.
- Microfiber cloths
- Soap and water solution
- Sandpaper (400 and 1000 grit)
- Plastic polish or headlight restoration kit
- Protective tape
Start by cleaning the headlights with soap and water. This removes dirt and grime. Then, use protective tape to cover the car’s paint around the headlights.
Next, sand the yellowed surface with 400-grit sandpaper. This step removes the outer layer of oxidation. Then, switch to 1000-grit paper to smooth the surface.
Rinse off any residue and dry the headlights completely. Apply plastic polish or follow your headlight restoration kit’s instructions. This will help restore clarity to your headlights. Finish by buffing and shining the headlights with a microfiber cloth.
Following this guide ensures a safe and effective way to fix yellowed headlights. It improves both visibility and looks on the road.
Common Misconceptions About Headlight Restoration
Understanding headlight restoration can help you make better choices. Many people believe headlight restoration misconceptions that don’t work. One myth is that it’s a one-time fix. But, while it can make headlights more transparent, you might need to do it again over time.
Another myth is that household items like toothpaste work well. While toothpaste might make headlights look better for a while, it’s not a long-term solution and is not as effective as specialized products for cleaning headlights.
Knowing the truth about headlight cleaning helps you choose the proper methods and products. Using the right stuff makes your headlights look better and keeps you safe on the road. Knowing these myths helps avoid frustration and keeps your car’s lights in shape.
How to Restore Oxidized Headlights Effectively
Dealing with oxidation on headlights can seem daunting. But knowing how to restore them makes it easier. Over time, headlights get dull and yellow from sunlight and the environment. This not only reduces visibility but also affects your car’s look.
To effectively restore oxidized headlights, follow these steps:
- Clean the Headlights: Begin by washing the headlights with soap and water. This removes dirt and debris.
- Choose the Right Method: Use sandpaper, a commercial kit, or household items like baking soda and vinegar.
- Sand the Surface: If you use sandpaper, start with a finer grit. Wet-sand the lens to avoid scratches.
- Apply Restoration Products: For the best results, use a specialized headlight restoration product. These products are made to penetrate and rejuvenate the oxidized surface.
- Seal the Headlights: After restoration, apply a sealant to protect against future oxidation. This step is key to keeping them clear.
By regularly checking your headlights and knowing how to restore them, you can keep visibility high and your car looking great. Using these restoration methods prevents damage that can get worse over time.
Evaluating the Best Headlight Restoration Kit
When looking for the best headlight restoration kit, there are key things to consider. The right kit can significantly affect how well your headlights look. Essential factors to consider include:
- Price: Find kits that are affordable but still high-quality.
- Ease of Use: Pick a kit that’s easy to use and has clear instructions.
- Effectiveness: Check how well each kit makes headlights clear again.
- Customer Reviews: Look at what other users say. Good reviews often mean a kit works well.
Top headlight restoration kits often get great reviews. Brands like 3M and Meguiar’s are frequently talked about. Their products are known for being durable and easy to use. Reading reviews can help you find the best kit for your needs.
Dealing with Foggy Headlight Repair
Foggy headlights can make driving unsafe. It’s important to know why they get foggy. UV rays, weather, and moisture are common causes.
There are ways to fix foggy headlights. You can use a special kit or items like toothpaste or baking soda. These can help clear the haze and make your headlights shine again.
After cleaning, apply a sealant to stop fogging. This keeps your headlights looking good and lasts longer. Regular care and cleaning also help your headlights work better.
How do you fix foggy lenses for good? Regular checks and touch-ups can keep your headlights clear. Taking care of your headlights makes driving safer for everyone.
Cloudy Headlight Fix: DIY Solutions
Many DIY solutions can fix cloudy headlights at home. You might already have the items needed. This method is easy and can save you money.
Try a paste made from baking soda and water. Use a cloth to apply it to your headlights and scrub gently. Then, rinse with water to see more precise headlights. This is a quick and effective way to fix your headlights using everyday household items.
Another good option is to use toothpaste. Its mild abrasives can polish cloudy headlights. Just apply a small amount to a cloth and rub it on the headlights. This shows how a simple bathroom item can be used for repairs.
For formidable clouds, try vinegar and baking soda. This mix can be cleaned well. Pour vinegar on the headlights, add baking soda and scrub. Rinse well to see more precise headlights.
Before choosing a method, weigh the pros and cons. Make sure to rinse well after cleaning to avoid residue. This helps keep your headlights in good shape.
When to Seek Professional Help
Knowing when to hire professionals for headlight restoration can save you time and frustration. DIY restoration might seem cheap, but it has its limits. If your headlights are heavily oxidized or damaged, it’s time to get expert help.
Car owners usually can’t access advanced techniques and specialized equipment. Professionals have the skills to check your headlights’ condition. They can make sure your headlights are clear and bright again.
Look for signs you need expert help, such as:
- Severe yellowing that does not improve with home remedies
- Deep scratches or cracks on the surface
- Persistent fogging after cleaning attempts
If you see any of these signs, it’s time to get professional help. Knowing when DIY restoration is not enough keeps your vehicle safe and improves your visibility on the road.
Cost Comparison of DIY vs. Professional Restoration
When you think about fixing your headlights, knowing the cost difference between DIY and professional services is key. DIY methods might look good because they’re cheaper, costing between $10 and $50 for a kit. But you also need to consider the time and effort it takes to do it yourself.
Professional services, on the other hand, can cost between $100 and $150. They offer better and longer-lasting results because experts use special tools and products that work better.
Choosing between DIY and professional help depends on your budget, the state of your headlights, and how much work you’re ready to do. Weighing the pros and cons will help you pick the best option. Remember, the cost of fixing your headlights is essential to consider.
Conclusion
In summary, keeping your headlights clear is key for safe driving. This article shows you how to spot when your headlights need a clean-up and shares tips on making them shine bright again.
Learning about headlight care means using the right tools and avoiding common mistakes. Knowing when your headlights need attention can also help. Regular maintenance makes your car look good and keeps you safe on the road.
Knowing how to care for your headlights is crucial. You can keep your headlights in top shape by learning and applying the proper techniques. This small effort can make a big difference in your driving experience.
FAQ
What are the common signs that indicate my headlights need restoration?
Look for foggy or yellowed lenses, reduced brightness, and scratches or chips. Fixing these early keeps you safe and visible.
How can I fix yellowed headlights at home?
First, clean your headlights. Then, use a headlight restoration kit. Follow the kit’s instructions, focusing on yellowed spots for best results.
What tools and supplies do I need for headlight restoration?
You’ll need sandpaper, polishing compounds, microfiber cloths, and UV sealant. Shujha Auto Garage has reliable products for this job.
Can I restore oxidized headlights by myself, or should I seek professional help?
With the right products, you can fix oxidized headlights yourself. But if the damage is really bad, get a pro for the best fix.
What is the best headlight restoration kit available?
The top kits have all you need and easy-to-follow instructions. Choose ones with good reviews for success.
How can I repair foggy headlights?
Clean the foggy headlights and apply a restoration product. Use polishing and sealing to keep them clear.
Are DIY solutions effective for fixing cloudy headlights?
Yes, DIY fixes can clear cloudy headlights. But, results vary. Know the pros and cons before trying.
When is the time to seek professional help for headlight restoration?
If DIY doesn’t work or damage is severe, get a pro. They have the skills and tools for a proper fix.
How do I compare the cost of DIY restoration to professional services?
Look at upfront costs, long-term results, and convenience. DIY saves money but takes time, while pros offer better results.
